Before mounting the 'front lens cell' to the 'rear lens cell' at the
objective end of the OTA, the Jaeger 6" f/10 objective will have to be
mounted inside of the front lens cell. But, I can not do this step
until I properly space the crown and flint elements with evenly spaced aluminum
tabs; a total of six (6). Starting with this page, I will
describe the steps I took to do this.
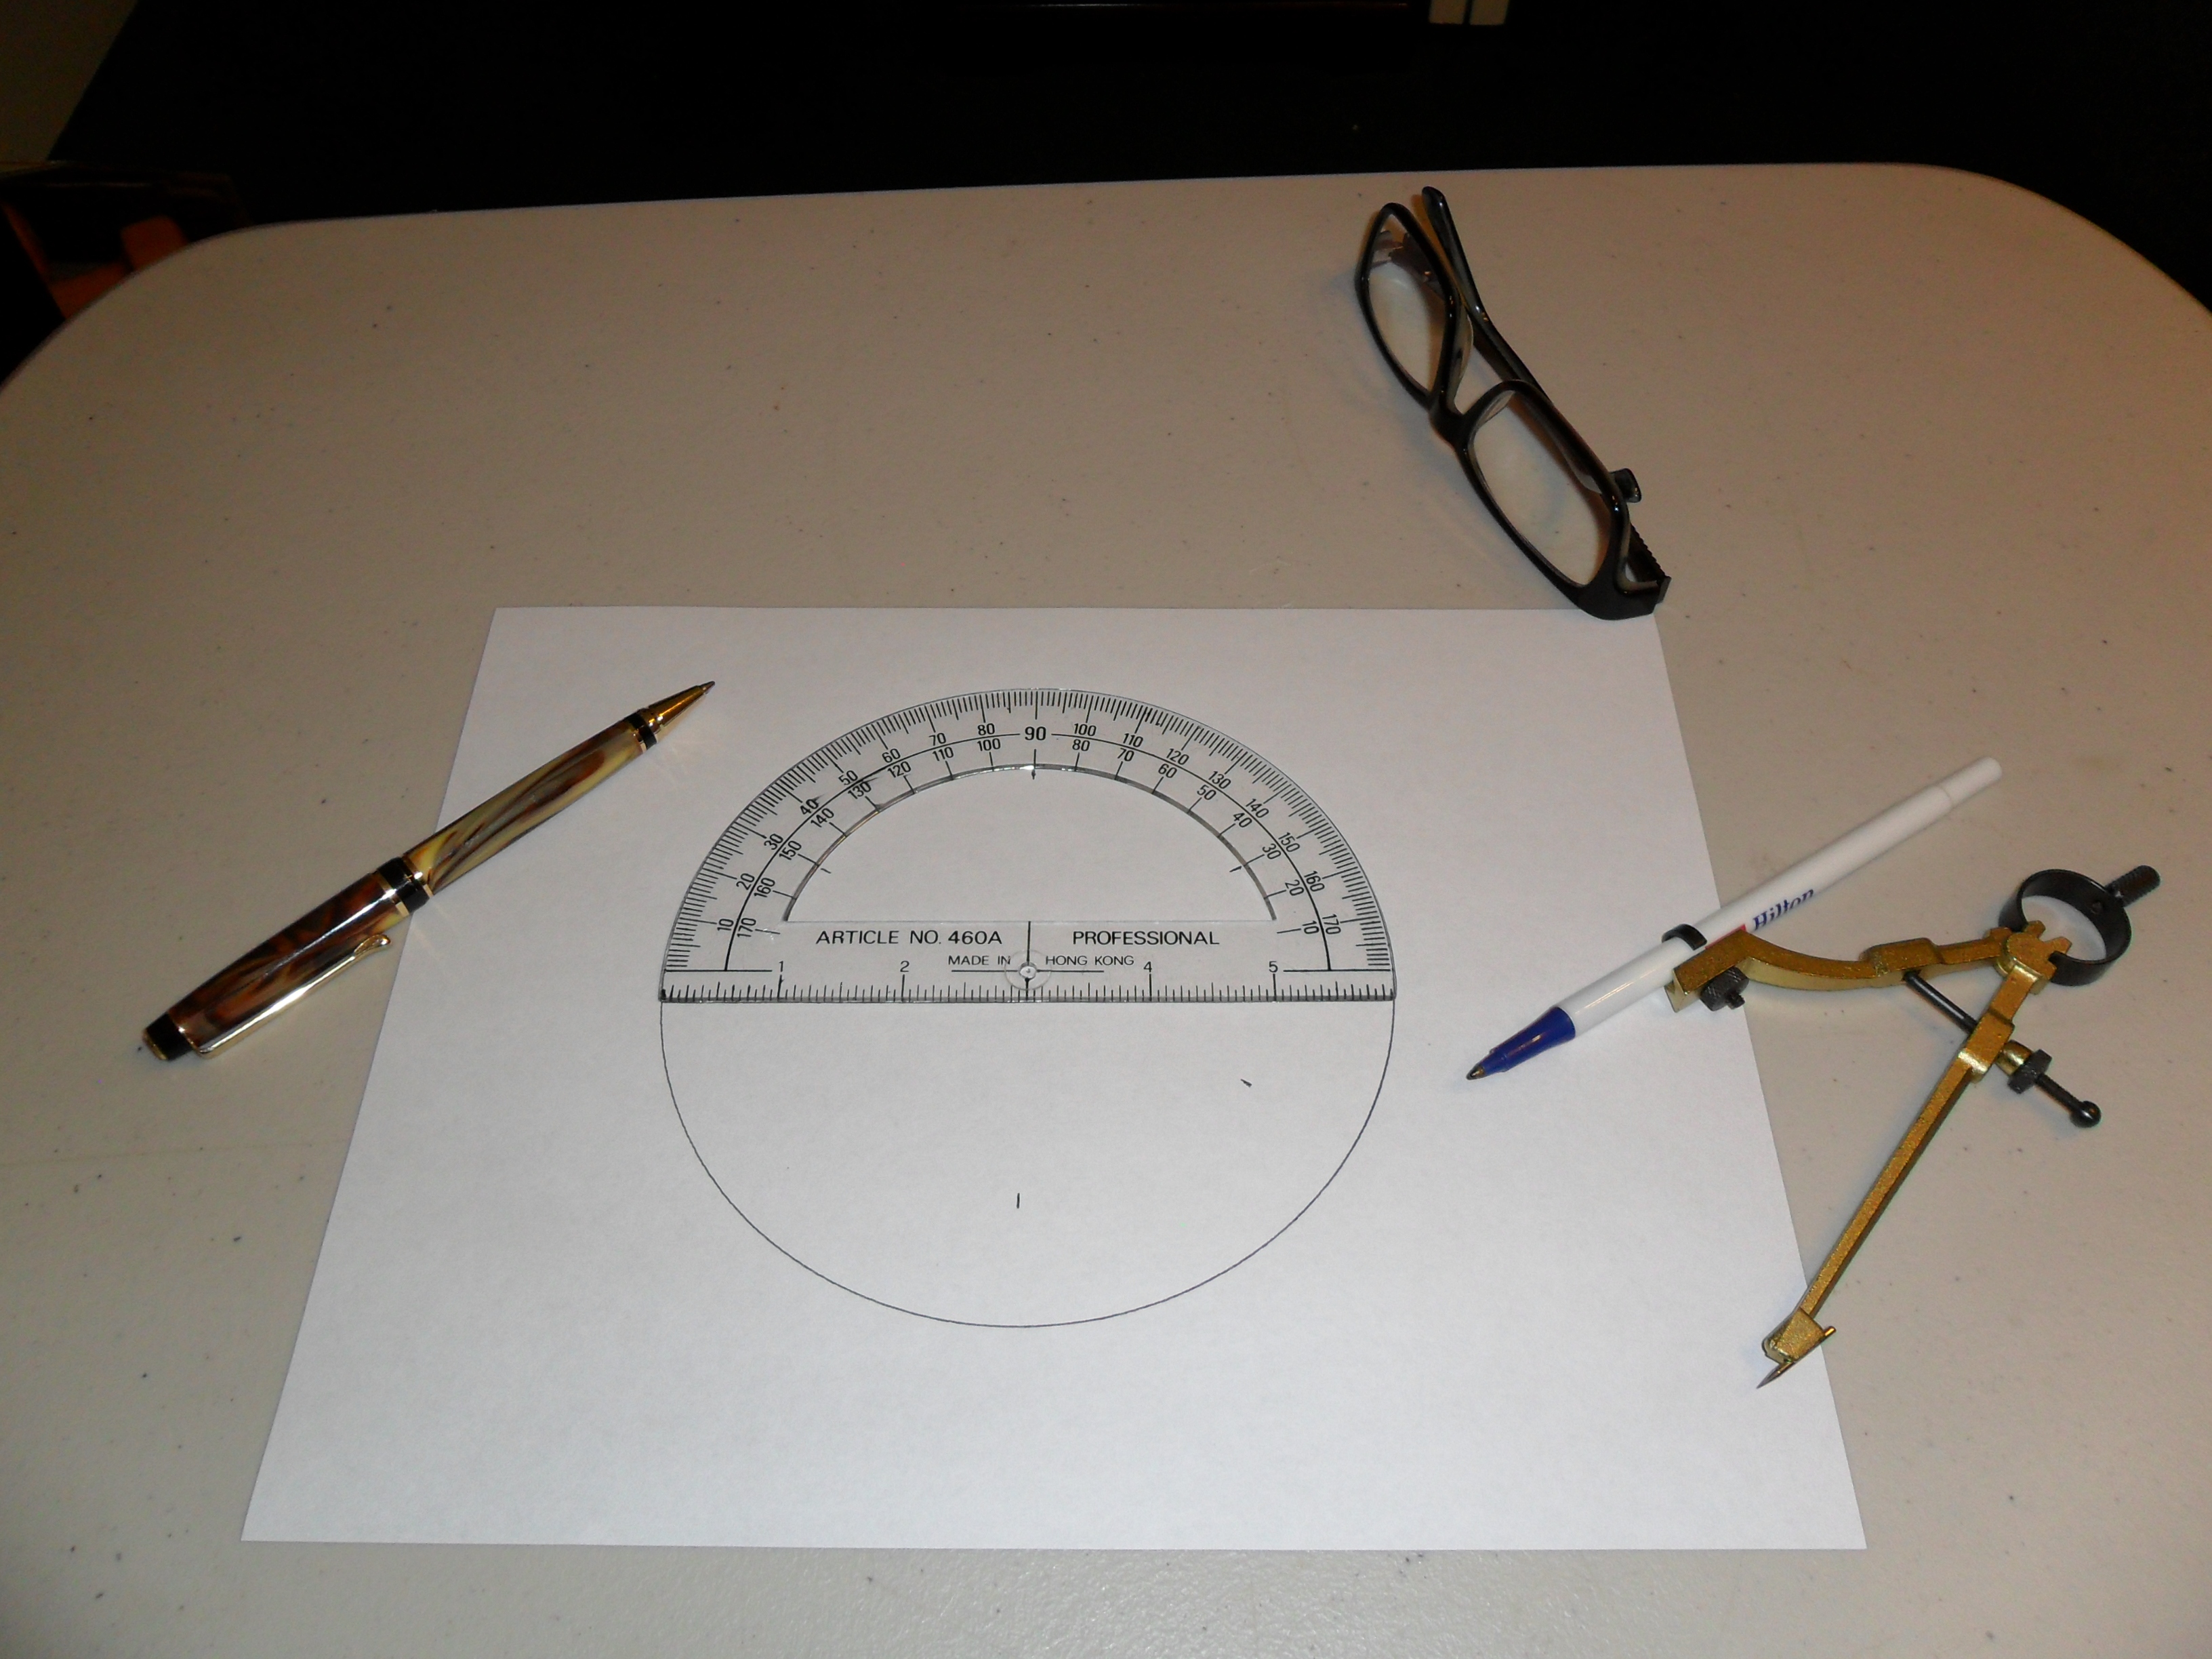
The tools I will be using
(not all are seen in the photo) for this process are a 180-degrees compass w/ straight-edge,
a rule, a circle compass w/ pen or
pencil, additional pen or pencil and a pair of scissors. And for those visually impaired to
do close-up work, a pair of readers.
BTW - Once I have finished
using the template for placement of the aluminum spacer tabs onto the
flint element, it will serve another important purpose that I will
reveal afterwards.
Step 1 --- Making the
template begins with drawing a 6.1" inch circle onto a sheet of copier
paper using the circle compass. This
circle will represent the true diameter of the unmounted objective
lens. |
|