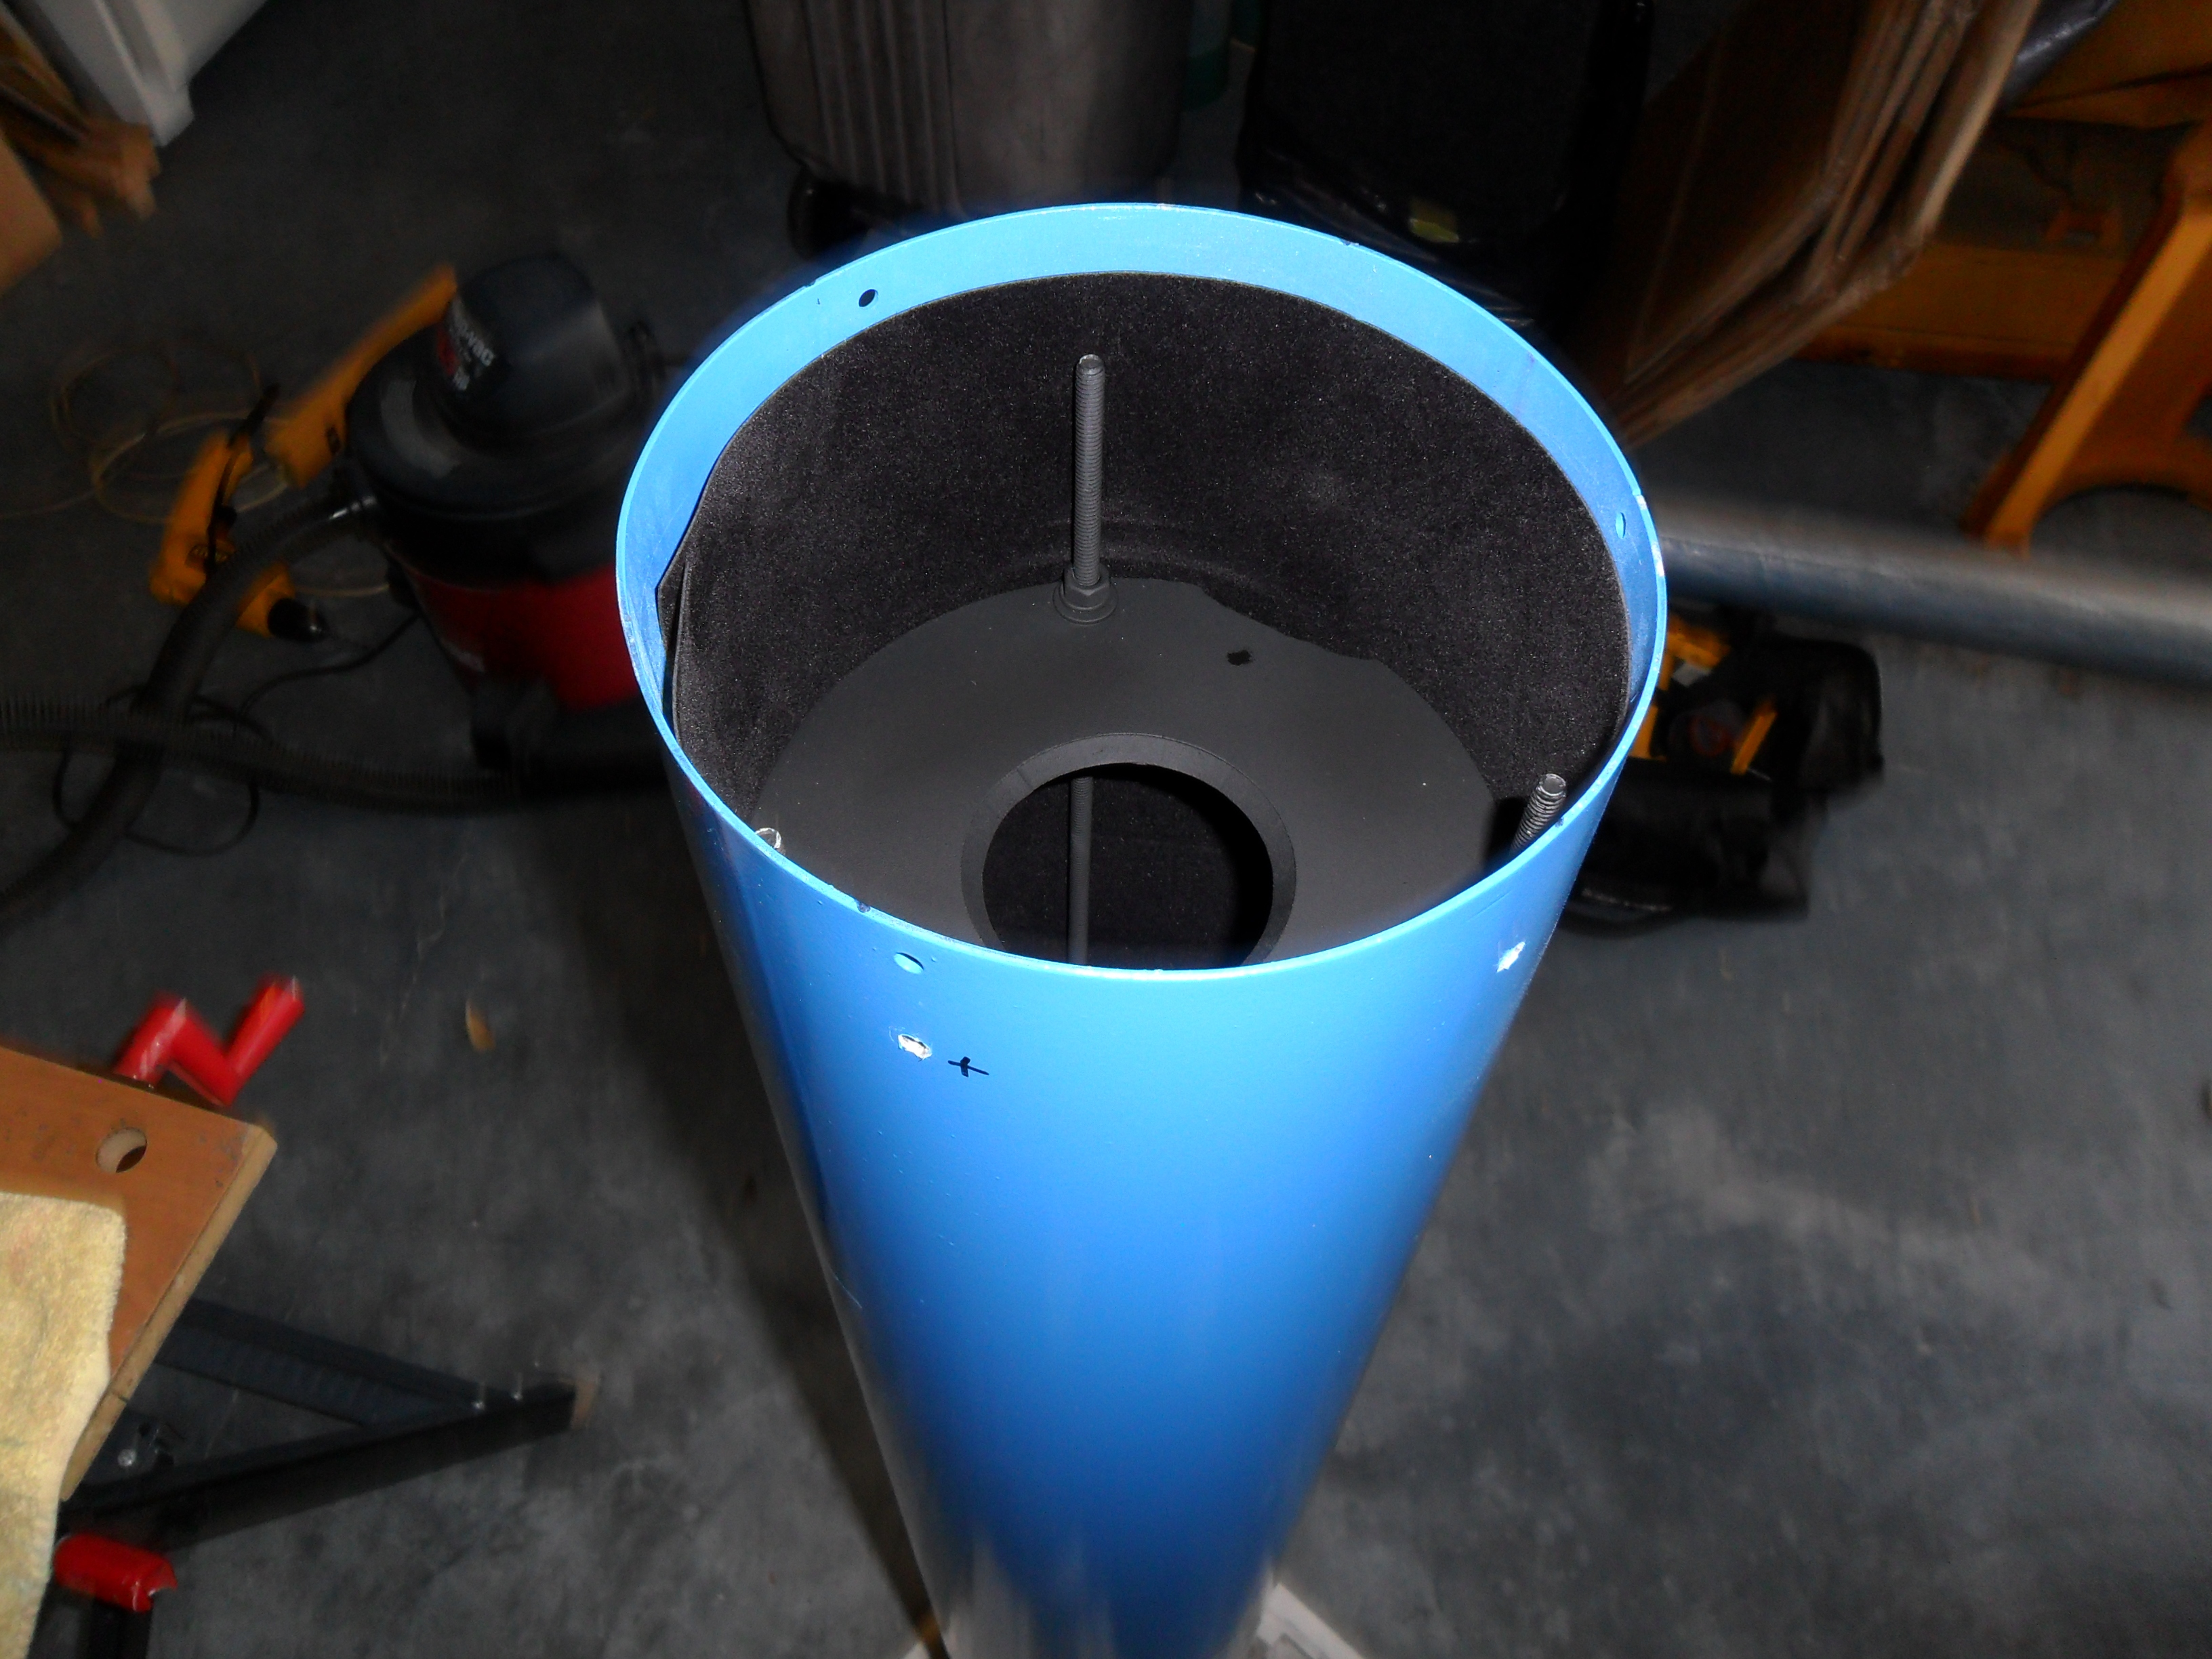
The ProtoStar FlockBoard and baffle rack have finally been installed
into the main tube! Now we have an OTA coming together! And getting
the wrapped baffle rack down the tube was not much of a challenge.
As I pushed the wrapped baffle rack down the main tube to its final
position, I had to use a hammer and smaller diameter (5" OD) section
of tubing (protected n the bottom) to help drive it home. Actually, it fit perfectly? I thought I was going to have to secure
the baffle rack in a manner that would prevent it from sliding inside
of the main tube, but I did not have to. The wrapped baffle rack
actually fit quite snug. I only used a few small pieces of automotive
double-stick tape (used for affixing items like chrome strips to the
exterior of vehicles) between the ProtoStar FlockBoard and the inside
wall of the main tube, just to keep the ends of the flocking material
from flopping over in front of the focuser. In any case, when I
install the OTA handles, they will also prevent the flocking material
from flopping down, as well as from shifting. I contribute much of my success
in getting a great fit to the fact that I allowed for the thickness of
the flocking material when I determined the precise diameter of the
baffles I needed to cut out.
Make note that the edge of the
ProtoStar FlockBoard in recessed into the tube by able 3/4" to 1".
This was done in order to give room for the insertion of the focuser
backplate. In addition in the photo, and as I said I would do on the
page before, you will see that I have drilled the holes (side "X") for
attaching the OTA handles to the main tube. |
|