|
Pictured
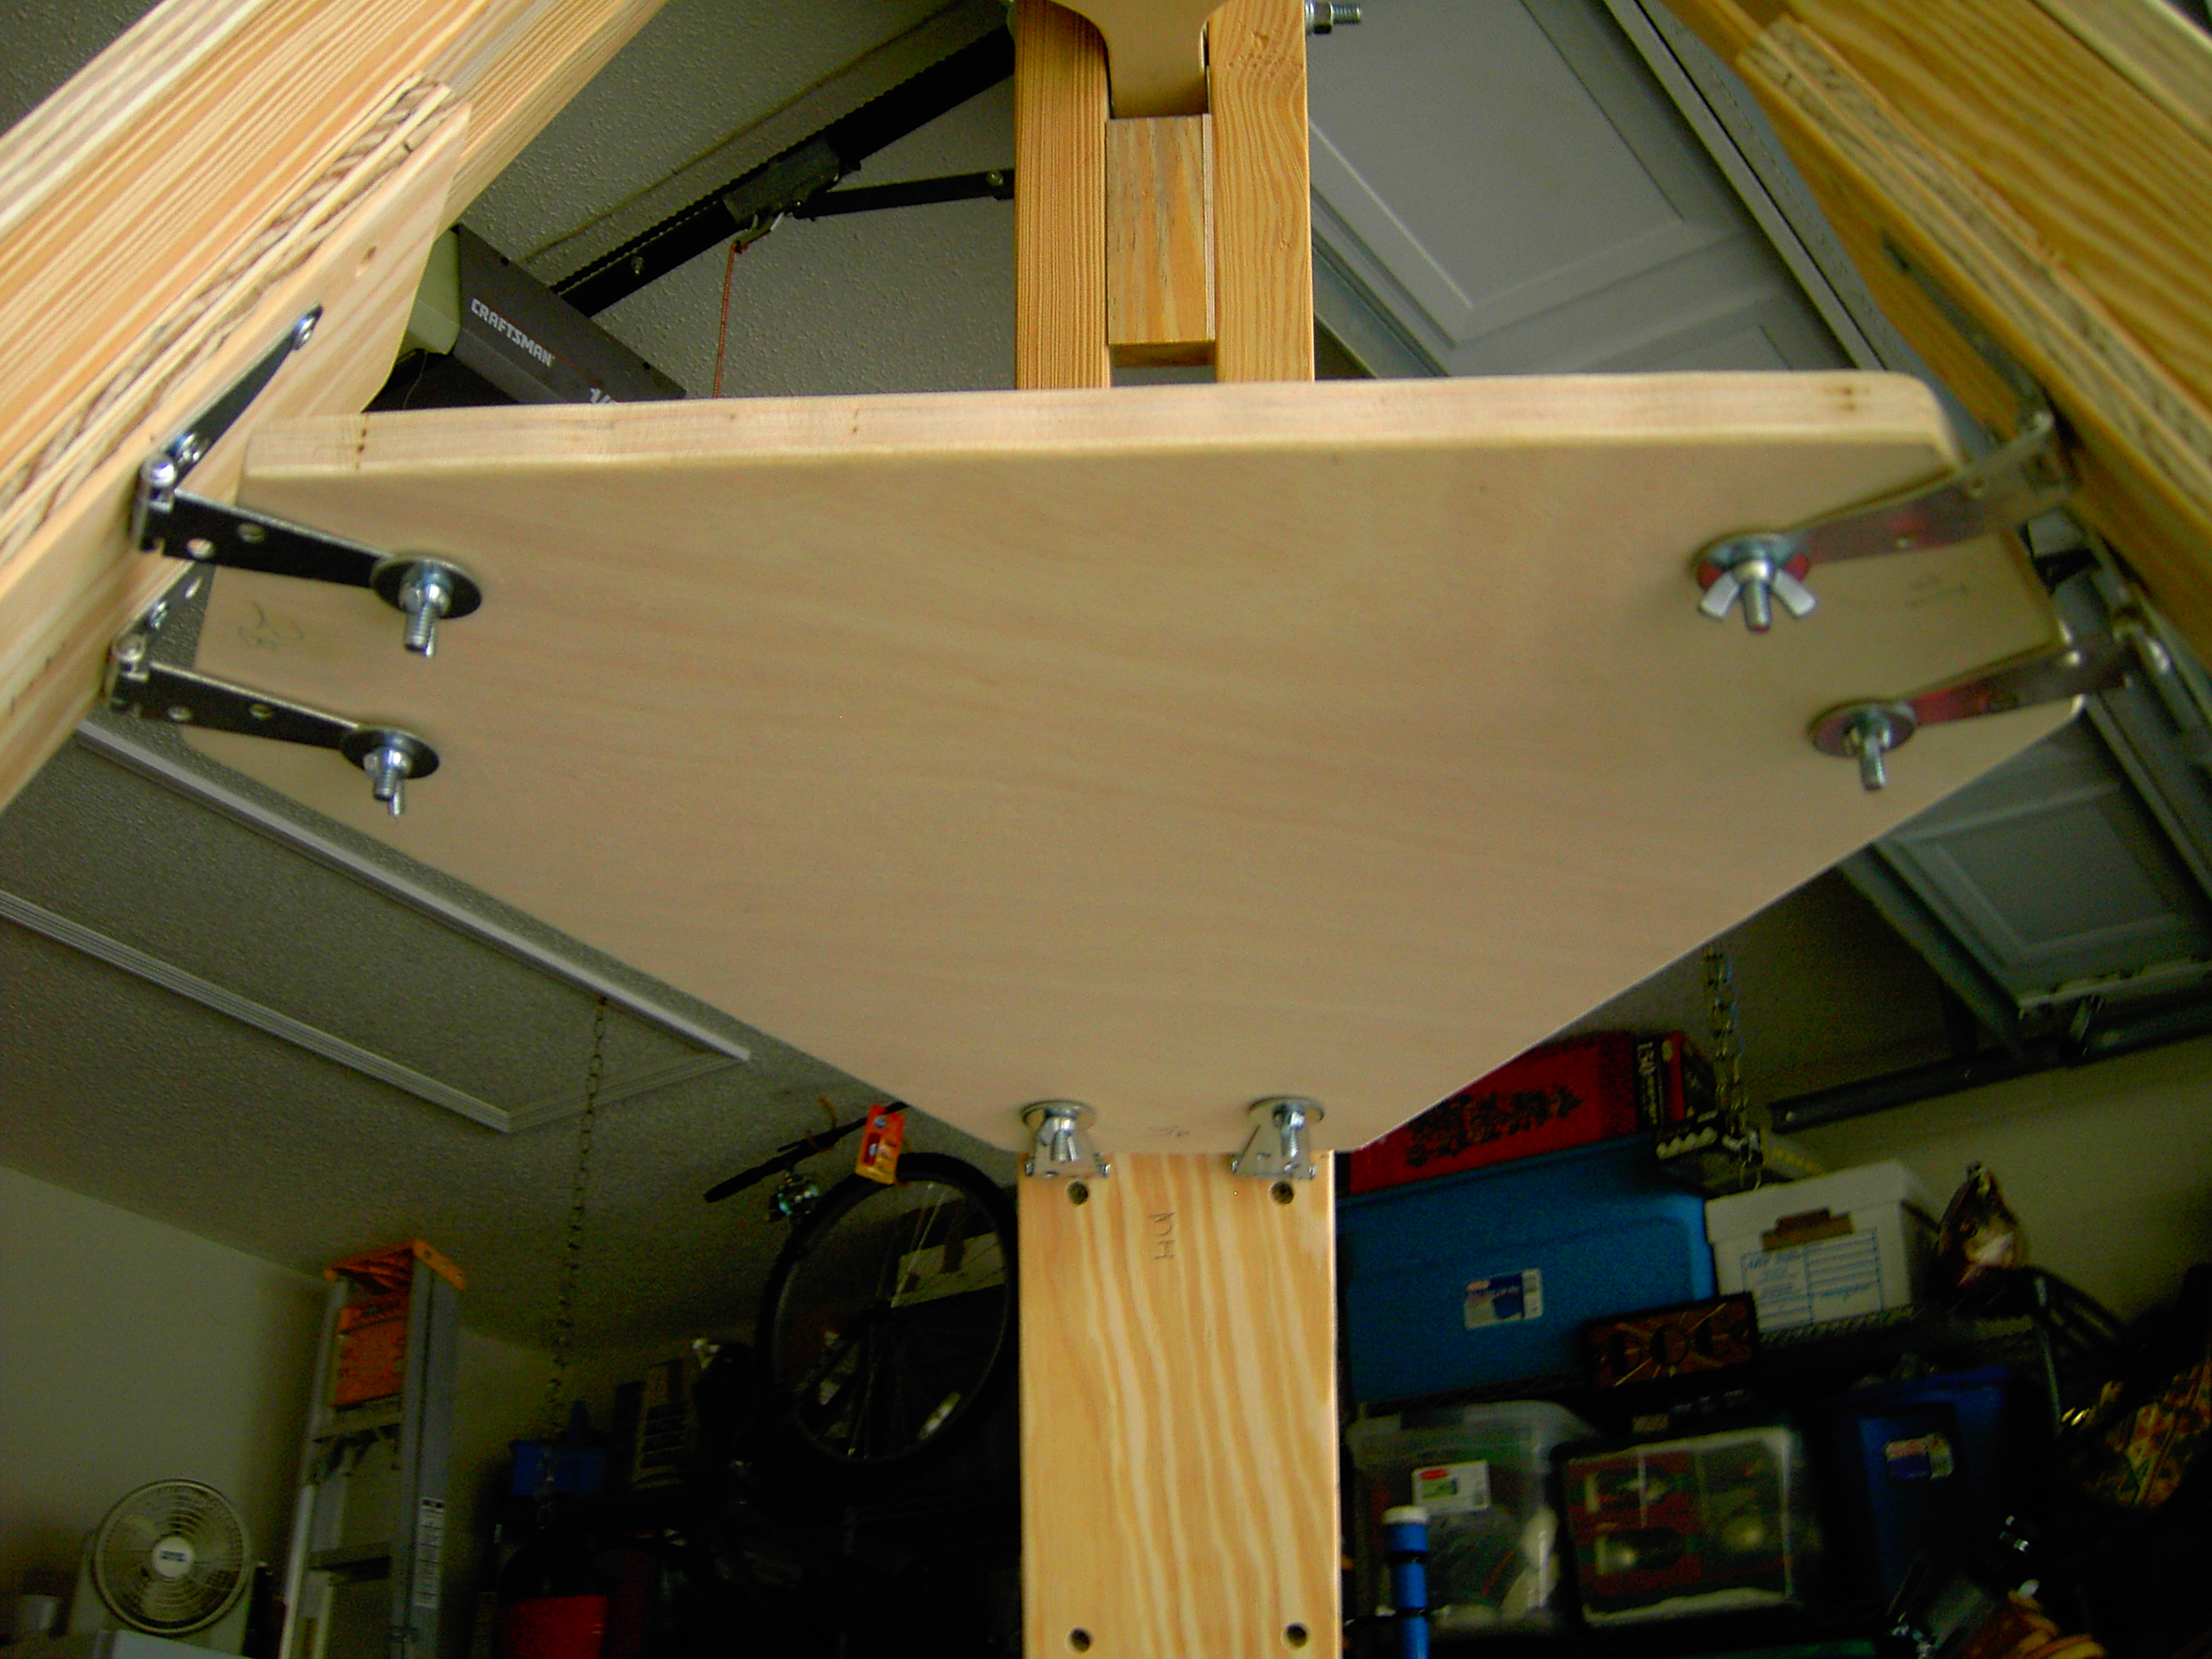
above is a bottom view of the installed Accessory Tray. The tray is
attached to the legs of the tripod at a convenient height via six 3”
inch strap hinges (two per leg) connected to the inside faceplate
of the legs. The strap hinges in conjunction with six 1/4x20 1 ˝”
inch bolts, six 1/4x20 wing nuts, and twelve Ľ” inch ID - 1 Ľ”
inch OD washers were used to make the connection. You can use higher
quality hinges if you prefer. Just make certain to select hinges that do
not impart the need to place a screw through the center of the inside
faceplate of the legs. If they do, DO NOT allow the screw(s) to
penetrate the faceplate and making contact with the “adjustable center
leg” which would prevent it from sliding freely. This applies to all
legs. As a recommendation, it is best to use narrow hinges that will let
you install them to the legs with the screws penetrating only the
“main leg supports” instead. This will foster the use of more
reliable hardware for better holding power preventing the hinges from
being ripped away from the legs, causing irreparable damage to your fine
telescopic instrument. In our prototype, we used hinges made of stamped
steel. This will be changed in the next model to more robust heavy gauge
narrow door hinges.
|
|