After I finished applying the aluminum spacer tabs to the flint
element, I unwrapped the crown element, and prepared the two for
mounting in the front lens cell. But before inserting the lens set
into the cell, I wanted to properly clean them. The cleaning process
began by filling an extremely clean sink with enough tepid tap water
to cover one element. A few drops of mild dishwashing detergent was
added to the water and thoroughly blended. Then, a terry cloth towel
was placed at the bottom the sink containing the cleaning solution.
Next, wearing Nitrile gloves, working first with the flint
element, I gently lowered it onto the terry cloth towel lying at the
bottom of the sink. Then, I delicately cleaned both sides with cotton
balls without applying undo pressure to the lens surface. It is best
to lightly drag the cotton ball across the surface, rather than
applying direct downward pressure onto the lens surface. Once the
surface of the flint was thoroughly cleaned, and still wearing the
nitrile gloves, I removed the lens from the solution and flushed its
surfaces under running tepid tap water. Then I gave the lens a final
rinsing with distilled water to aid in flushing away the mineral
residue left over by the tap water, which would have left spots. As
the lens dried, I wicked away the remain droplets of distilled water
using the capillary action of the tips of pieces of paper towel. This
dramatically help alleviate the likelihood of mineral spots being left
on the lens once it has thoroughly dried. The same process was done
for the crown element.
With both lens elements clean, it was
time to mount them inside of the front lens cell. But, I am not going
drop the elements into the cell. This can cause irreparable damage. My
method to seat them will be to bring the cell up around them. To do
this, with the retaining ring removed, I placed the front lens cell
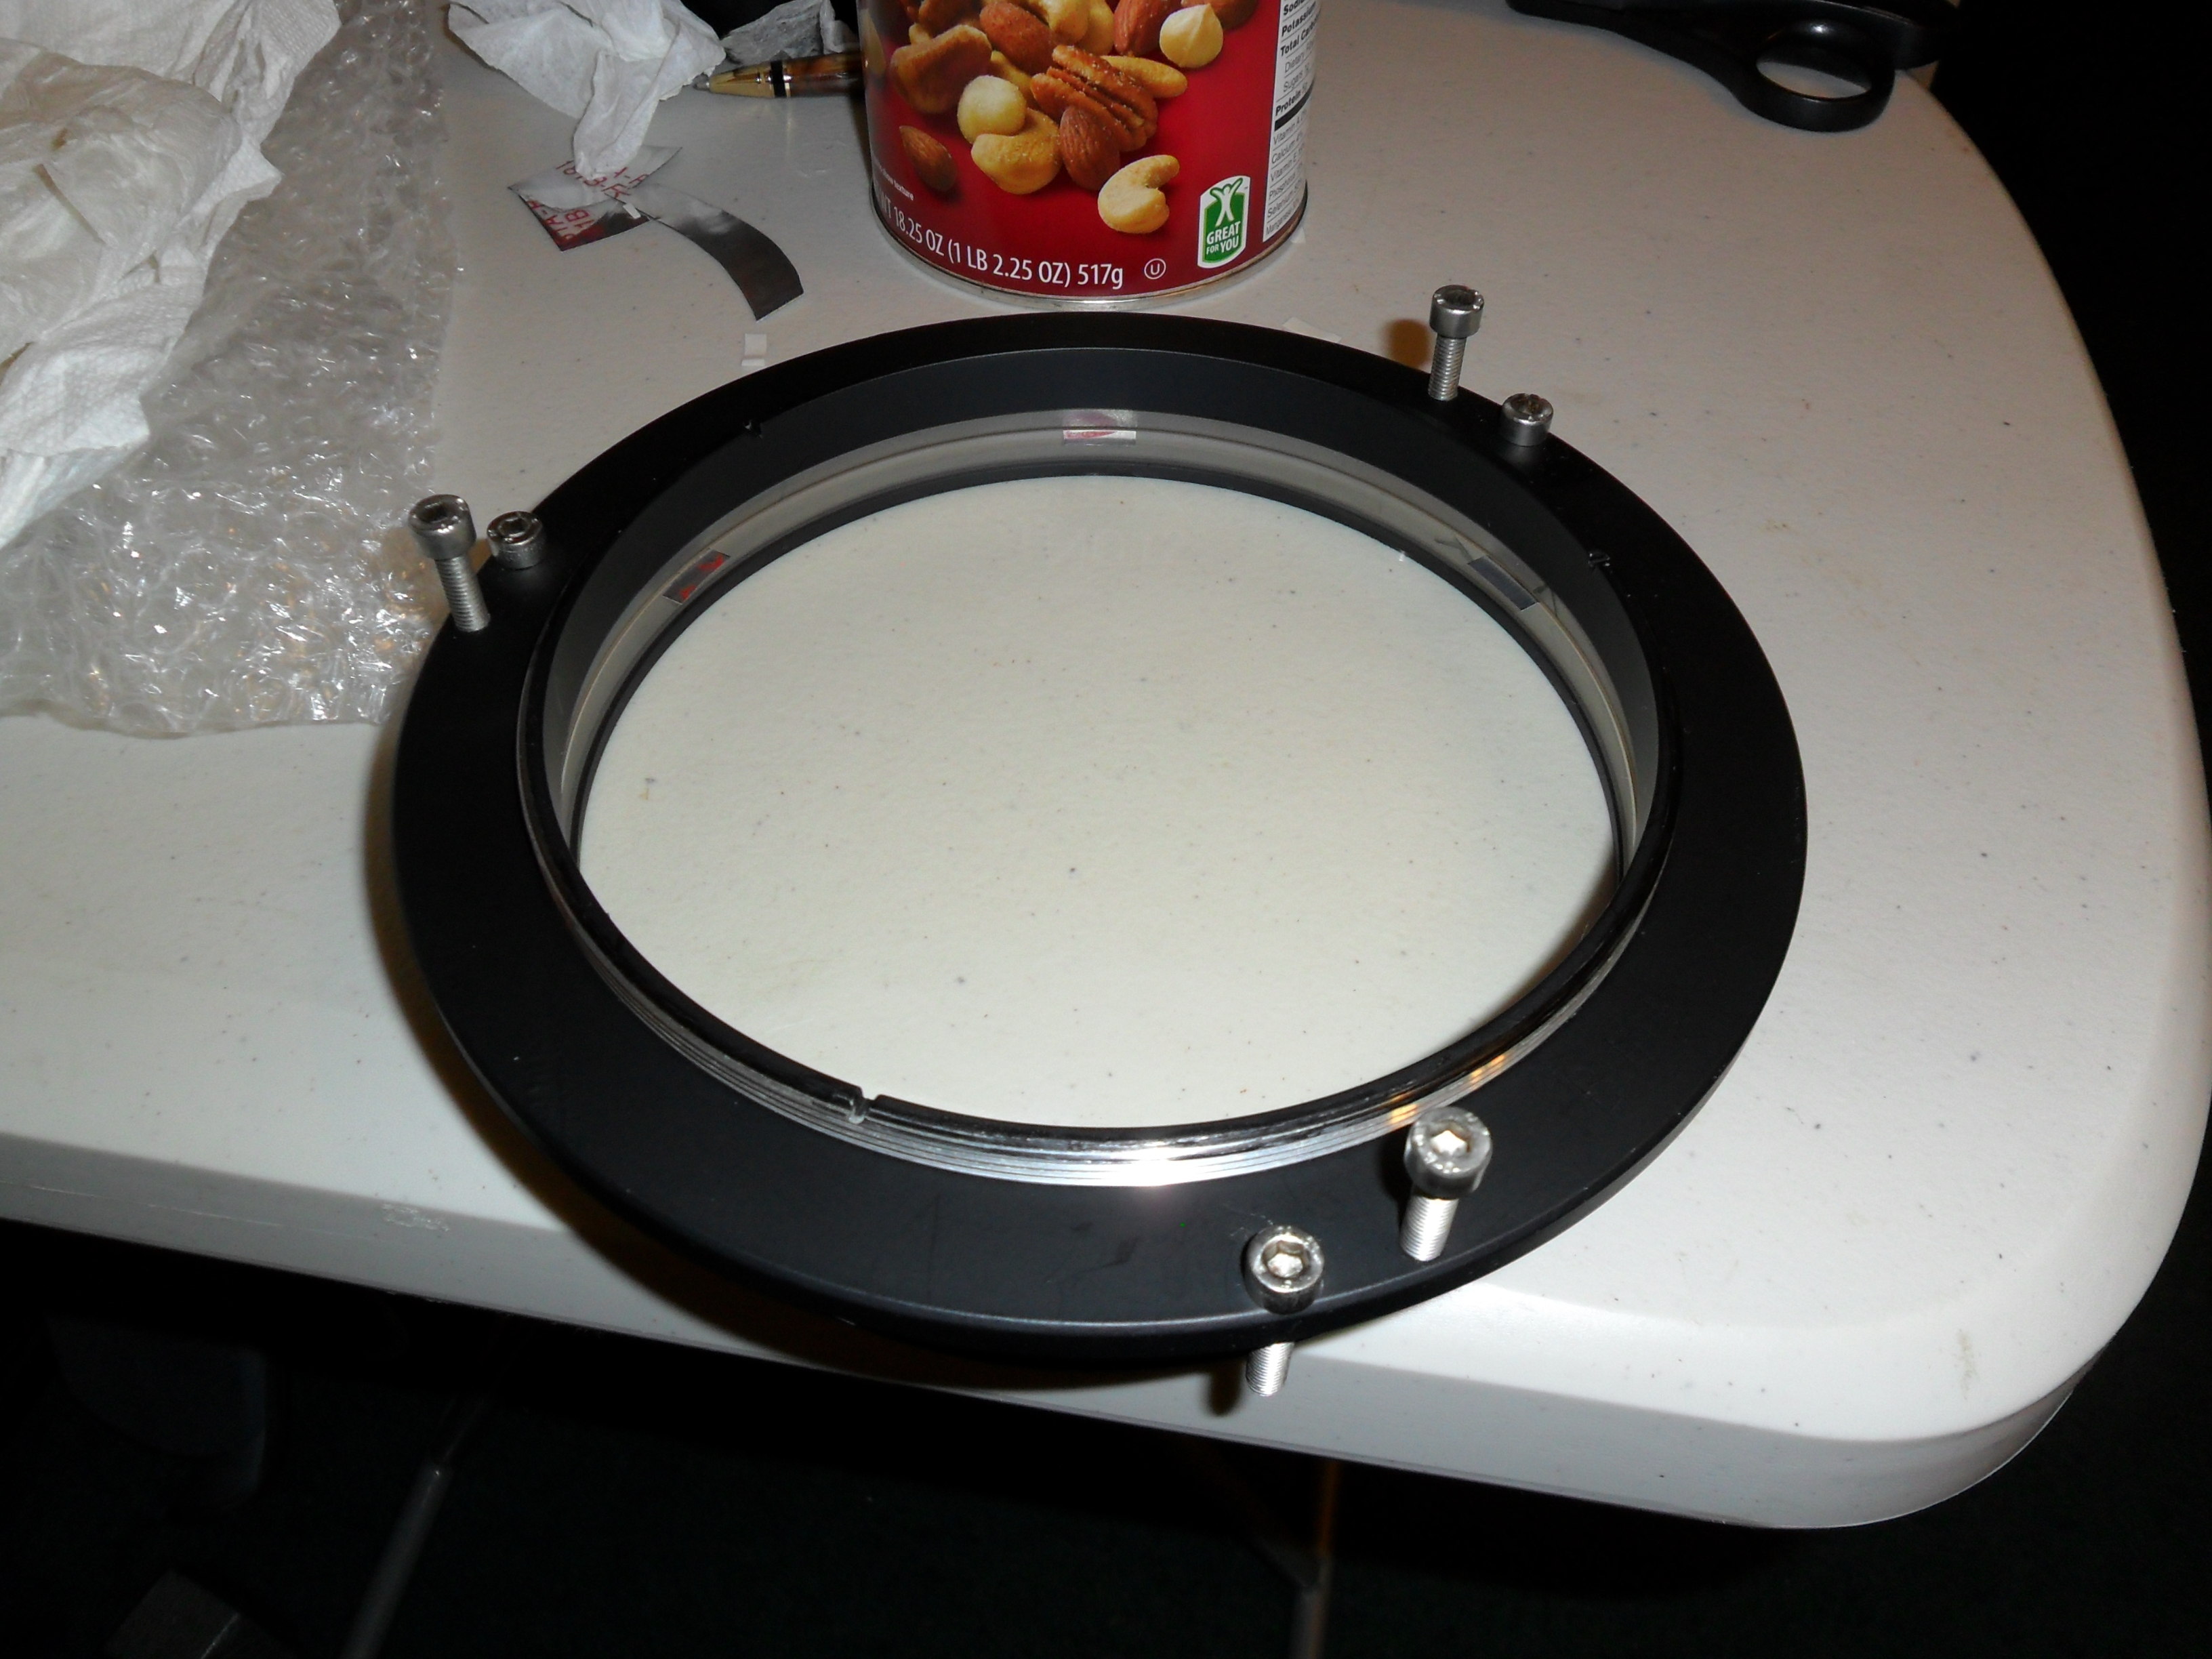
"face up" onto a clean flat stable surface. Then, I placed a can of
mixed nuts (that had a smaller diameter than you objective) in the
center of the front lens cell. Next, I took a Kimwipe and covered the
top of the can. With the lens elements in the correct orientation
facing up, I carefully placed and aligned the objective lens set atop
the Kimwipe. As they rest atop the mix nut can, the front lens cell
was then raised up to capture the objective lens elements until they
made contact with the cell's seat and then I lifting arrangement up
off the can. Removing the can, I placed the cell supporting the
objective back down on the table surface and screwed on its retaining
ring to secure the elements in the front lens cell. The end result can
be seen in the photo above. After one more top view of the mounted
Jaeger 6" f/10 achromatic lens, she will be ready to attach to the
rear lens cell already mounted to the OTA. |
|